17 Kate Tutorial
Kate is a free text editor that can be used on Windows, Mac and Linux alike.
It has good support for right-to-left scripts, handles large files reasonably well, and allows the creation of custom highlighting and folding schemes (for instructions for installing the OpenITImARkdown scheme, see below).
This tutorial showcases only the most relevant functions of Kate for our purposes;
for more information, please refer to the Kate Handbook, which
can also be accessed through the Help menu in the program itself.
17.1 Installing Kate editor
17.1.1 On Windows
Download the most recent installation file here:
https://binary-factory.kde.org/view/Windows%2064-bit/job/Kate_Release_win64/ ; go to the Pipeline Kate_Release_win64 section on that page and download the file that ends with_64-cl.exe.Once the file was downloaded, double-click the installation file and follow the instructions (you can keep all the default settings the installer proposes)
Kate should now be installed on your computer. Proceed to install the OpenITImARkdown highlighting scheme (see below)
17.1.2 on Mac
Download the
.dmgfile here: https://binary-factory.kde.org/view/MacOS/job/Kate_Release_macos/ (choose the file that ends with.dmg, the other file is a checksum)Once downloaded click on the .dmg file, double click on the “kate” icon or drag it to the Applications folder
NB: You will most likely get a message like
“kate” can’t be opened because Apple cannot check it for malicious software.
This software needs to be updated. Contact the developer for more information.
This is because recent Mac instances do not allow you to install apps from non-verified developers. There is however a way to override this security measure:
- Go to “system preferences” => “security & privacy” => under “general” you will see a note saying
"Kate" was blocked from use because it is not from an identified developer - click “open anyway”
- a new pop up will appear where you will have to consent again, and then the app should launch
The process is generally explained here (+ a shortcut if you’re feeling adventurous):
- Go to “system preferences” => “security & privacy” => under “general” you will see a note saying
Kate should now be installed on your computer. Proceed to install the OpenITImARkdown highlighting scheme (see below).
17.2 Installing the OpenITI mARkdown highlighting scheme for Kate
17.2.1 On Windows:
Download the highlighting scheme
OpenITImARkdown.xmlfile by right-clicking on this link and choosing “Save link as”.In Windows Explorer, go to
C:/Usersand double-click the folder with your user nameIn your user folder, find the folder
AppData. This folder is sometimes hidden; to make it visible, you may have to go to the “View” tab in Windows Explorer, and check the box next to “Hidden items”:
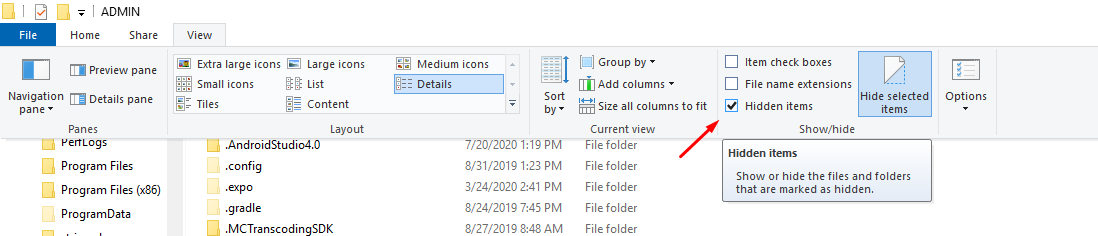
make hidden files visible
Enter the
AppDatafolder, double-click theLocalfolder, and make a new directory in it:org.kde.syntax-highlightingWithin the new
org.kde.syntax-highlightingfolder, create another new folder:syntax. The full path to this folder should now beC:\Users\<user_name>\AppData\Local\org.kde.syntax-highlighting\syntaxCopy the
OpenITImARkdown.xmlfile into the newly createdsyntaxfolder.Close the Kate editor if it was open, and open it again.
You should now be able to find the OpenITImARkdown highlighting scheme in the list in the Tools > Highlighting > Markup menu:
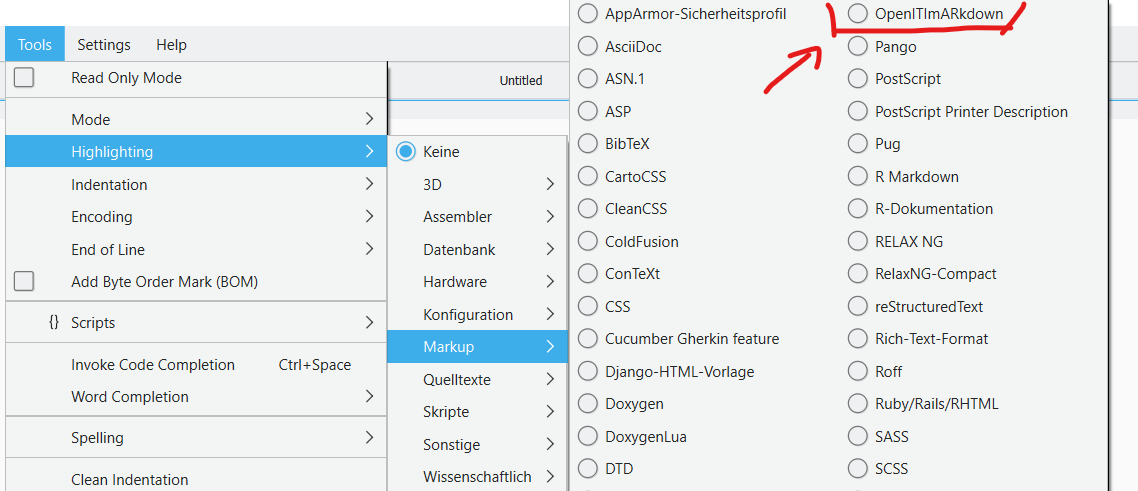
OpenITImARkdown in Tools menu
And also in the dropdown menu in the bottom right of your Kate screen:
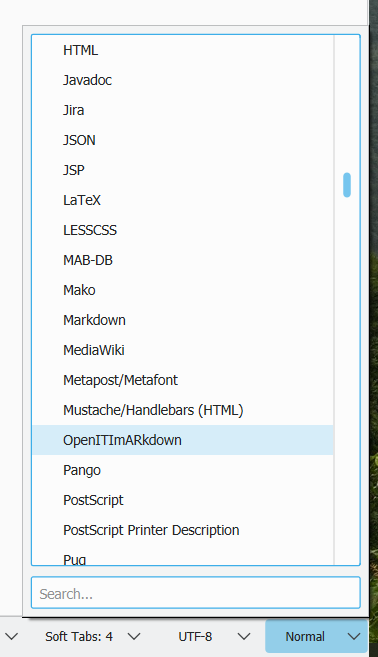
OpenITImARkdown in dropdown menu
17.2.2 On Mac:
(Thanks to John for figuring this out!)
- Download the highlighting scheme
OpenITImARkdown.xmlfile by right-clicking on this link and choosing “Save link as”. - Open Terminal (see https://www.idownloadblog.com/2019/04/19/ways-open-terminal-mac/)
- Create new subdirectories in the
~/Library/Application Supportfolder by executing this command:
mkdir -p "$HOME/Library/Application Support/org.kde.syntax-highlighting/syntax"NB: the quotation marks are essential because there is a space in the path!
- Assuming the
OpenITImARkdown.xmlfile is in theDownloadsfolder: execute the following command to copy it to the newly created folder:
cp ~/Downloads/OpenITImARkdown.xml "$HOME/Library/Application Support/org.kde.syntax-highlighting/syntax"Alternatively:
- Open Finder
- in the Finder menu, choose
Go > Go to folder..., write~/Library/Application Support/, then clickGo - create a new folder using the combination command+shift+n, and call it
org.kde.syntax-highlighting - Move into that folder, and create another subfolder using command+shift+n, called
syntax - Copy the
OpenITImARkdown.xmlfile into that folder
Close the Kate editor if it was open, and open it again.
You should now be able to find the OpenITImARkdown highlighting scheme in the list in the Tools > Highlighting > Markup menu:
OpenITImARkdown in Tools menu
And also in the dropdown menu in the bottom right of your Kate screen:
OpenITImARkdown in dropdown menu
17.3 Working with Kate
17.3.1 Activating the OpenITI mARkdown highlighting scheme
If you have correctly installed
the highlighting scheme, texts that have the extensions .mARkdown, .completed
or .inProgress should automatically activate the highlighting scheme.
You can see the active highlighting scheme in the dropdown box at the bottom right of the screen:
OpenITImARkdown in dropdown menu
If this does not say OpenITImARkdown, click the button, write OpenITI and
select the OpenITImARkdown.
NB: there is also a markdown highlighting scheme in the list; this is designed
for the markdown language on which OpenITI mARkdown is loosely based,
but will not highlight OpenITI mARkdown text correctly.
Alternatively, you can select the OpenITImARkdown highlighting scheme in the
list in the Tools > Highlighting > Markup menu:
OpenITImARkdown in Tools menu
17.3.2 Folding sections
One of the most useful features of Kate and OpenITI mARkdown is that it allows you to fold all sections, displaying only their headers.
In the menu, go to View > Code Folding > Fold Toplevel Nodes to collapse all
sections, and View > Code Folding > Unfold Toplevel Nodes to make them visible
in their entirety again.
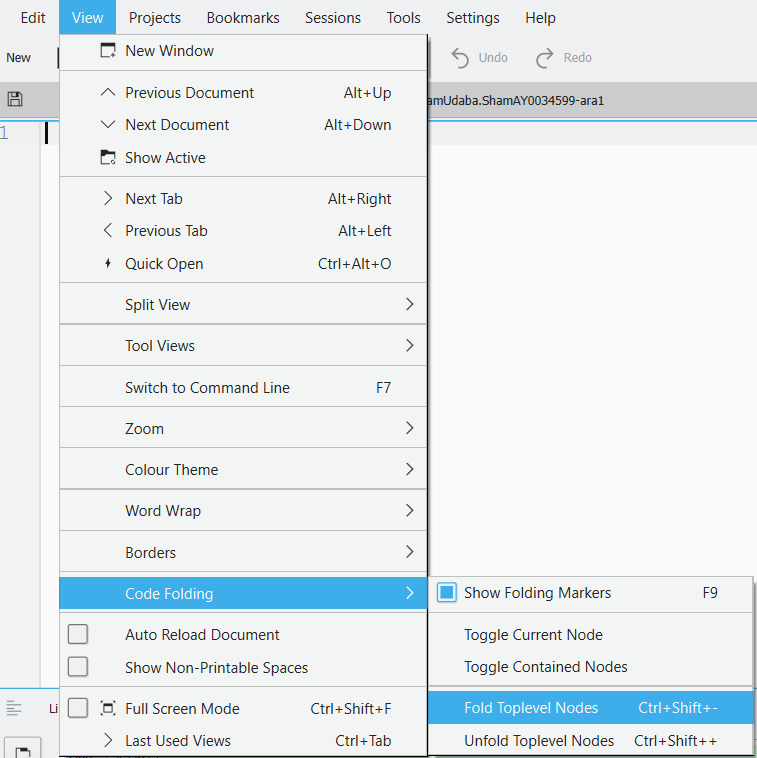
You can also use the following key combinations:
CtrlShift-for foldingCtrlShift+for unfolding
NB: In a large text, it may take a second or two for the folding to take effect.
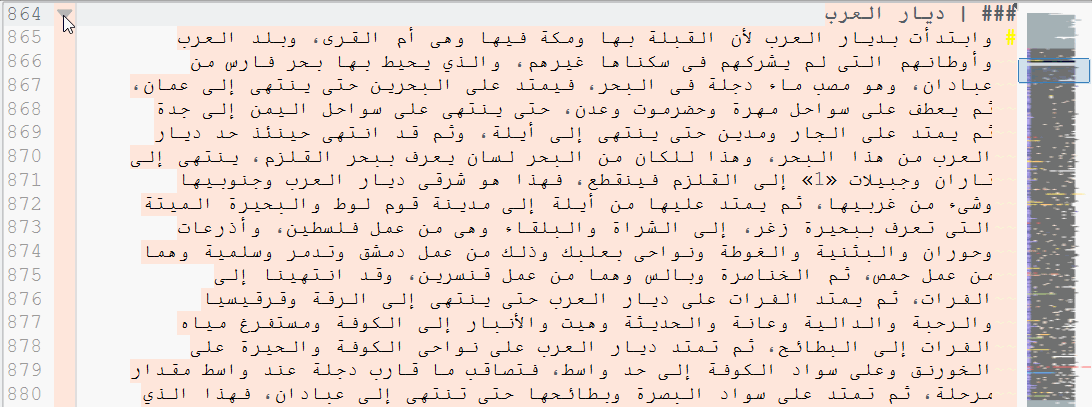
You can also use the triangles next to the line numbers in the text to fold/unfold a single section:
17.3.3 Search and replace
Kate contains three options for searching and replacing:
- the
Searchbar: simple search in the current document - the
Power Search and Replacebar: regex search and replace in the current document - the
Search in Filesbar: regex search and replace in multiple documents at the same time
The latter option is the most powerful, and displays all matched lines.
17.3.3.1 Search bar
To make the Search and replace bar visible, go to Edit > Find:

You can also use the Ctrl+F key shortcut.
This opens up a basic search bar, in which you cannot use regular expressions:
 * The
* The Aa button toggles case sensitivity on and off.
- You can close the search bar by clicking the button with
xin a red circle at the left-hand side of the search bar.
To use regular expressions, open the Power Search and Replace Bar
by clicking the button with the sliders on the right of the search bar: 
17.3.3.2 The Power Search and Replace bar
To make the Search and replace bar visible, go to Edit > Replace:
You can also use the Ctrl+R key shortcut.
This opens the Power search and replace bar at the bottom of the screen:

Selected controls:
With the
Modedropdown, you can select whether you want to use Regular Expressions or plain text search.The
Aabutton toggles case sensitivity on and off.You can close the
Power Search and Replacebar by clicking the button withxin a red circle at the left-hand side of the search bar.Use the
Replacebutton to replace only the current match; useReplace Allto replace all matches in the document.If you hit the
Find allbutton, the number of matches found in the document will be displayed.
17.3.3.3 The Search in Files bar
This is Kate’s most powerful search and replace option.
Open the Search in Files bar in one of three ways:
* in the menu, choose Edit > Search Files
* use the shortcut key combination Ctrl+Alt+F
* click the Search and Replace button in the bottom left of the screen:

The Search in Files bar contains much more options than the other search bars:
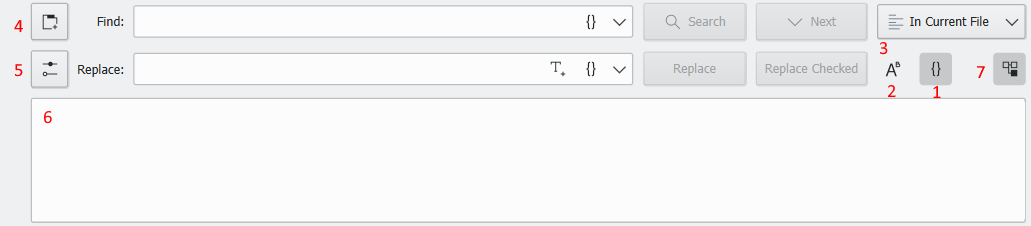 1.
1. {} button: toggle regular expressions on/off
2. Aa button: toggle case sensitivity on/off (default: case insensitive,
“abc” will match “abc”, “ABC”, “aBc”, etc.)
3. You can define whether the search and replace operation is executed only in
the current file, in all open files, in a folder, in a project, or in all open
projects.
4. you can run multiple searches at the same time: open a new search tab with
this button
5. use this button to show all search options.
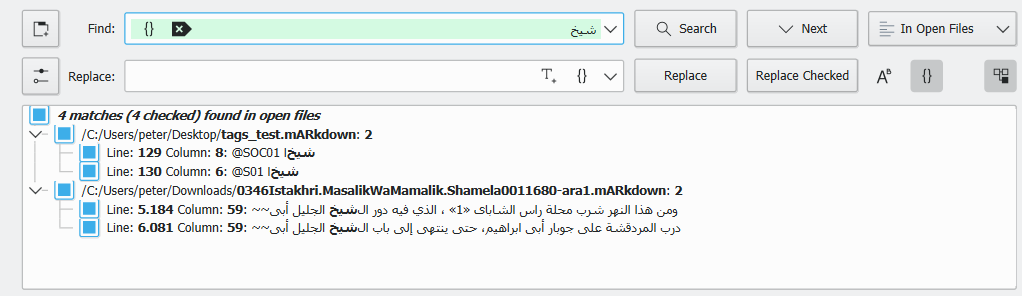
6. When you conduct a search, the results will be displayed in the results pane:
 7. You can expand and collapse the search results in each file using this button:
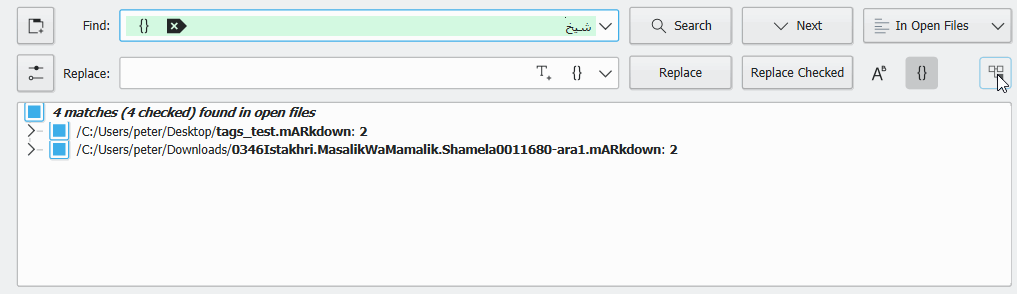
You can check and uncheck results in the results pane; use the button Replace Checked to replace all checked results in the results pane.
NB: for regex capture groups, Kate uses the \1, \2, etc. syntax (as in Python),
not the $1, $2, etc. syntax (as in Perl and JavaScript):
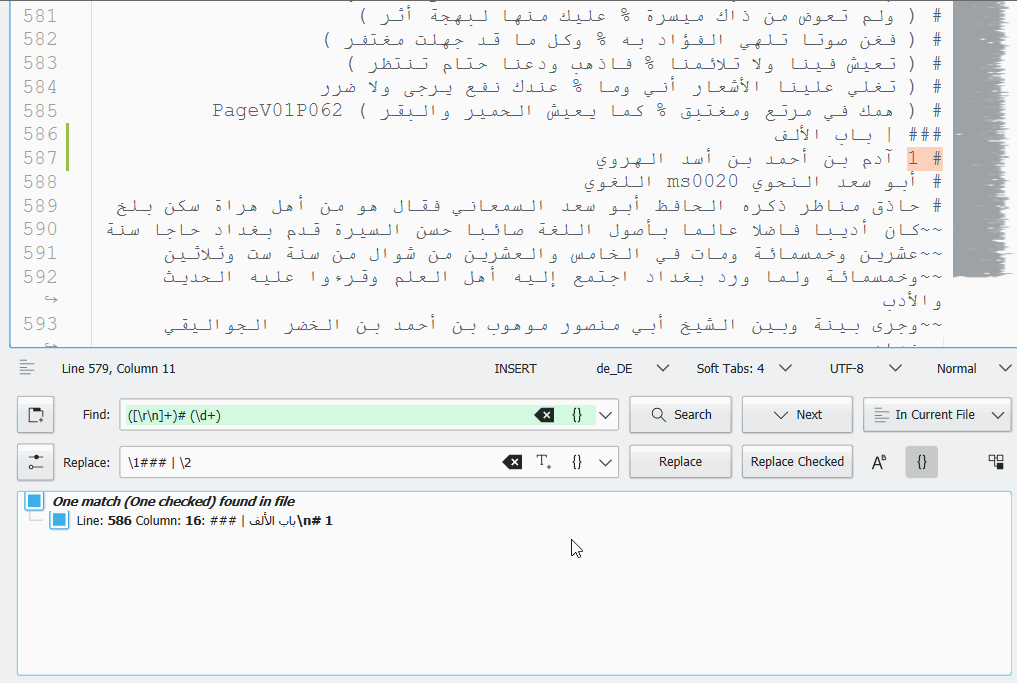
Replace a # tag on a new line followed by a number by a ### | tag
17.3.4 || Displaying the toolbar
A tool bar can be displayed below Kate’s menu bar.
Go to Settings > Show Toolbar to display it.
You can add buttons to the toolbar in the Settings > Configure Toolbars.
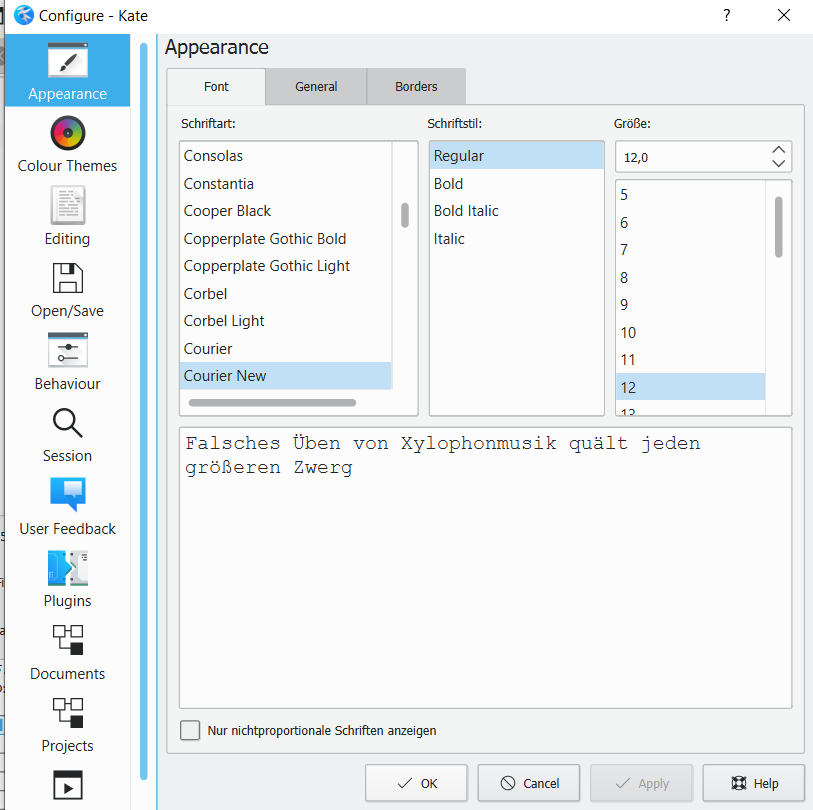
17.3.5 || Change font and other settings
Go to Settings > Configure Kate to change the font, font size and other settings: